

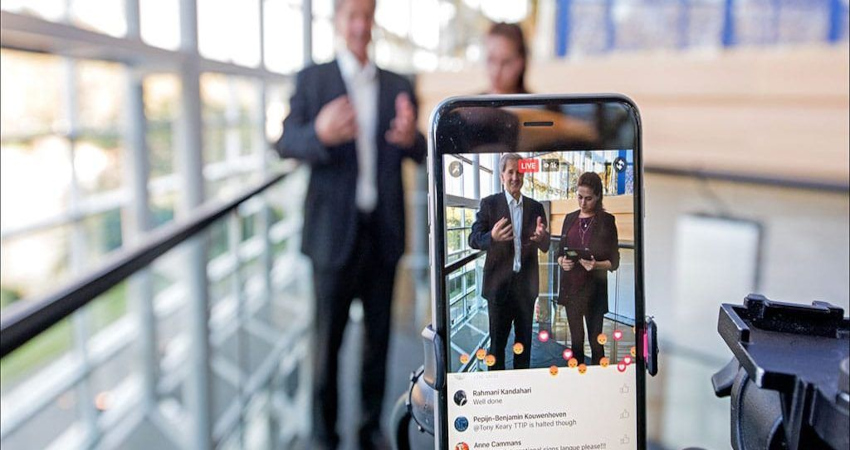
Live videos have become indispensable on the internet. YouTube Live, Facebook Live, Instagram Live, TikTok Live, Twitch, LinkedIn Live: creators, brands, coaches, trainers, artists, associations and individuals increasingly use live streaming to communicate with their audience in real time.
A live lets you create a direct connection with your followers. You can answer questions, showcase a product, host an event, comment on current news, launch a course, share a personal moment, make a live sale, or simply chat with your community. The format is spontaneous, lively and often more authentic than a regular video.
But there's a problem that many discover too late: a live stream can disappear. The replay can be deleted automatically, remain available only for a limited time, be removed by mistake, lose its chat, disappear after an account is deleted or become inaccessible after a change of settings.
Still, a live stream can be very valuable. It may contain an important interview, a product demonstration, a customer testimonial, a conference, training, a tutorial, a debate, an announcement, or a key moment with a community. Once lost, it can sometimes be impossible to recover.
That’s why it’s essential to know how to save your live broadcasts and replays before they disappear. In this article, we’ll look at why live videos should be archived, what to back up, platform-specific limitations, how to organize your files, and how to use a tool like All Downloader responsibly.
Why saving your live streams has become essential?
For a long time, many creators treated live streams as ephemeral content. You'd start a broadcast, subscribers would watch, and then the content would either disappear or just sit somewhere on the profile. Today, that view is too limited.
A live stream is not just a moment in real time. It’s also raw material. From a one-hour live, you can create multiple pieces of content: short clips for TikTok, Instagram Reels, YouTube Shorts, carousels, quotes, blog posts, podcasts, newsletters, or training courses.
A live stream can also serve as an archive. A company might want to keep a webinar. an association can retain a record of a presentation. A coach can reuse a Q&A session. A creator can turn the best moments into clips. A trainer can review their content to improve the next session.
The problem is that platforms don't always guarantee permanent retention. For example, YouTube notes that a live stream under 12 hours may be archived automatically, which illustrates that there are conditions and technical limits depending on the type of broadcast.
Saving a live stream is a way to avoid relying entirely on a platform.
Why might a replay disappear?
A replay can disappear for several reasons. The first is the platform's storage policy. Some platforms keep live streams for a limited time. For example, Facebook announced an update to its storage policy: new Facebook Live streams remain available for 30 days, with tools to download, transfer, or convert certain content before deletion.
The second reason is manual deletion. A creator may delete a live stream by mistake, think they won’t need it anymore, and later regret not keeping a copy.
The third reason is an account issue. If an account is suspended, hacked, deactivated, or deleted, the associated content may become difficult to recover.
The fourth reason is rights-related. Music, a video, or a protected clip broadcast during a live stream can lead to restrictions, audio muting, or partial removal.
The fifth reason is technical. A live stream may not be correctly recorded. The connection can drop, the archive may be incomplete, audio may be missing, or the file may be corrupted.
That's why you should think about backing up even before starting the live stream.
What to save after a live stream
When people talk about saving a live stream, they often think only of the video. But proper archiving must go further.
You should back up the full video file, the audio, the thumbnail, the title, the description, important links, useful comments, the chat if possible, performance stats, and important clips.
The chat can be very valuable. It contains viewers' questions, reactions, objections, inquiries, testimonials and sometimes ideas for future content.
The live description is also important, especially if it contains links to an offer, a registration, a product, a course, or an event.
Statistics can also be useful: view count, average watch time, peak viewers, engagement, shares, comments. For a creator or a brand, this data helps understand what works.
A well-saved live stream isn't just a video — it's an entire folder.
Backing up your own YouTube Live streams
YouTube is one of the most used platforms for long live streams: conferences, shows, tutorials, launches, interviews, gaming, events, webinars. The advantage is that YouTube often offers automatic archiving of live streams, under certain conditions. According to YouTube Help, live broadcasts shorter than 12 hours can be archived automatically.
After a YouTube live, the creator can usually find their content in YouTube Studio. They can check whether the replay is available, edit the title, description, thumbnail, chapters, and visibility settings.
However, don’t confuse "replay available" with "secure backup." As long as the only copy is on YouTube, you depend on your account, the platform, and its rules. For important content, it’s best to download a local copy.
YouTube allows creators to download their own videos from YouTube Studio, and Google Takeout can also be used to export channel-related data. This method is especially useful for creators who have a lot of content to archive.
After downloading, create a clearly labeled folder: YouTube LiveThen a subfolder for each year or event. Add the thumbnail, the original title, the description, and optionally a text file with the links mentioned during the live stream.
Save a Facebook Live before it expires
Facebook Live is used by merchants, associations, local pages, coaches, trainers, influencers and individuals. The format is convenient because it reaches a profile’s or page’s followers directly.
But Facebook changed how it stores lives. New Facebook Live broadcasts may be available for 30 days, then automatically deleted. Facebook states that creators can download the full file during this 30-day window to archive it or post it elsewhere.
Meta also explained that, for some older live streams archived before deletion, users may receive a notification and have 90 days to download, transfer to cloud storage, or convert the content into a Reel.
This completely changes the logic. Previously, many people let their live streams sit on their profiles for years. Now it's better to quickly download important content.
For a professional Facebook Live, it's recommended to save the video as soon as the broadcast ends. Then you can create short clips, publish them as Reels, turn them into short-form videos, or archive them in a client or event folder.
Save an Instagram Live
Instagram Live is widely used by creators, influencers, personal brands, shops, coaches, artists and communities. It's perfect for quick interactions, launches, interviews, or spontaneous conversations.
After a live, Instagram allows you to share the replay to your profile and feed, or find it in the live archive if the option is available. Instagram's Help Center also states that it's possible to download a live video to your camera roll after the broadcast ends.
This means you need to act quickly after the live. Many users close the app, assume everything has been saved, then forget to download the video. Later they can't find the content or don't know which menu to look in.
The best practice is to check the archive settings before the live, then download the video as soon as the live stream ends. You should also check that the file is present in the phone's gallery.
If you regularly do Instagram lives, create a dedicated folder on your phone or in the cloud. For example: Instagram Live - Interviews, Instagram Live - Questions réponses, Instagram Live - Produits, Instagram Live - Archives.
TikTok Live: replays, clips and limits
TikTok Live has become a very powerful format for creators, sellers, artists, gamers, and community accounts. TikTok Live can generate a lot of engagement because it combines vertical video with fast interactions, gifts, comments, and a recommendation algorithm.
TikTok also highlights features related to replays and highlights in its LIVE Studio. The platform says creators can review, edit, and publish videos from their live streams to attract new viewers and showcase the best moments.
This shows a major trend: platforms no longer want live content to remain isolated. They encourage creators to turn their live streams into short clips.
But even then, you need to be careful. Not all options are always available for every account, every country, or every type of live. Creators should therefore check their TikTok Live settings, their replays, their clips, and the available download options.
The best practice is simple: after every important TikTok Live, immediately check the available content, grab the useful clips and save anything that might be useful later.
Turn a live stream into multiple pieces of content
A one-hour live may seem long and hard to repurpose. Yet it often contains many short, interesting clips.
You can convert a live stream into several formats:
- A vertical clip for TikTok.
- An Instagram Reel.
- A YouTube Short.
- A LinkedIn post with a quote.
- A blog post.
- A newsletter.
- An audio podcast.
- A long edited video.
- A training course.
- A customer testimonial.
- An FAQ.
- A summary carousel.
For example, a live Q&A can become ten short videos. Each question can be turned into a clip. Each key tip can become a post. Each mistake mentioned can become an article.
That's why you shouldn't view backups as just a safety measure. It's also a content strategy.
How to organize your replays after downloading?
Downloading a live stream isn't enough. If the files remain in the "Downloads" folder with unreadable names, you might not be able to find them later.
The right approach is to create a simple organization. For example:
LivesYouTube LiveFacebook LiveInstagram LiveTikTok Live2026InterviewsWebinairesVentes liveQuestions réponsesExtraits à publierArchives complètes
Rename each video with a clear structure: date, platform, subject. For example:
2026-08-13-youtube-live-formation-video.mp42026-09-02-instagram-live-interview-client.mp42026-10-15-facebook-live-lancement-produit.mp4
Also add a small text file with important information: live stream title, original link, description, speakers, mentioned links, clip ideas, and editing notes.
This organization saves you a lot of time when you want to repost a clip several weeks later.
Where to store your live streams?
An important live stream should never be stored in just one place. A computer can fail. A phone can be lost. a cloud account can fill up. A hard drive can be damaged.
For important content, keep at least two copies. For example: one copy on your computer and one copy in the cloud. For professional content, add a copy on an external hard drive.
If you’re a creator or a business, you can create a monthly archiving strategy. At the end of each month, save the live streams, organize them, remove duplicates, and keep the best clips in a separate folder.
The goal is to avoid wasting time searching for a video when you need it.
Mistakes to avoid before and after a live
The first mistake is assuming the platform will always keep the replay. That’s not guaranteed, especially when rules change.
The second mistake is waiting too long. The longer you wait, the more likely you are to forget, lose access, or miss a download window.
The third mistake is not testing the sound. A live stream with poor video can sometimes be salvaged, but a live stream without sound is often unusable.
The fourth mistake is not saving locally when possible. Some streaming tools allow you to record a copy to your computer at the same time as the broadcast. It’s a very useful safeguard.
The fifth mistake is not checking the file after downloading. Open the video and check the duration, picture, audio, and quality.
The sixth mistake is using music or copyrighted content without permission. This can lead to muted audio, restrictions, or removal.
Copyright: beware of other people's live streams
Saving your own live streams is one thing. Downloading other people's live streams is another. You must respect copyright, related rights, image rights, and the platforms' terms of service.
Service-Public reminds that it is forbidden to download protected artistic works without authorization. Arcom also specifies that streaming is legal in France when the content is distributed with the rights holders' authorization.
This means you must use backup tools responsibly. You may back up your own content, videos you have permission to save, or royalty-free content according to their terms. However, downloading a paid, private, protected live stream or one belonging to another creator to repost without permission can raise legal issues.
You should also be mindful of people visible in a live stream. Even if the video belongs to you, guests, clients, or participants may have rights to their image. For professional use, it's best to obtain their consent before reposting clips.
How can All Downloader help?
All Downloader can help retrieve and organize videos available online when their use is permitted. This can be useful for backing up your own content, maintaining a personal archive, retrieving a public replay that you're allowed to download, or centralizing videos before organizing them.
The appeal of a tool like All Downloader is its simplicity. Instead of spending hours figuring out how to retrieve content from each platform, you can save time and organize your files more neatly.
But All Downloader must be used responsibly. The goal is not to bypass protections, retrieve private content, or violate platform rules. The aim is to make it easier to save authorized, personal, or public content when doing so respects creators' rights.
Before using an external tool, always check whether an official option exists. YouTube Studio, the Instagram Archive, Facebook's tools, or TikTok's features can sometimes be enough. All Downloader complements them when you need a simple method to retrieve or organize certain accessible content.
Checklist before going live
Before starting an important live stream, take a few minutes to check these points:
Have you enabled local recording, if possible?
Does the audio work properly?
Is your internet connection stable?
Is your phone or computer charged?
Is the live title clear?
Does the description contain the correct links?
Do you have the rights to the music, images or videos used?
Have the guests given their consent to the recording?
Do you know where to find the replay after the live stream?
Do you have a folder set up to archive the video?
Have you planned any clips to create after the broadcast?
This checklist can prevent many problems.
Post-live checklist
Once the live is over, don't immediately move on. Perform these checks:
- Is the replay available?
- Was the full video saved?
- Is audio present from start to finish?
- Is the quality OK?
- Has the file been downloaded?
- Have the title, description, and thumbnail been saved?
- Have the highlights been marked?
- Have short clips been identified?
- Was the video copied to the cloud or to a hard drive?
- Should sensitive or private content be removed before reposting?
These steps take little time, but they can save valuable content.
Conclusion: a successful live should also be a saved one
Live streams have become an essential format for building connections, selling, training, informing, and engaging a community. But they shouldn't be treated as disposable content. A live can become a replay, a short clip, an article, a newsletter, training, a podcast, or a professional archive.
The real danger is thinking the platform will keep everything for you. Rules change, replays can expire, accounts can be suspended, files can disappear, and content can be deleted by mistake.
The right approach is to plan ahead. Before the live stream, set up the recording, audio, rights and logistics. After the live stream, quickly retrieve the video, check its quality, back it up in multiple locations and file it correctly.
All Downloader can help you better retrieve and organize certain accessible and authorized video content. When used correctly, it becomes a practical tool to ensure you don't lose your important videos.
A live stream sometimes lasts only an hour. But when properly saved, it can continue to create value for months.