

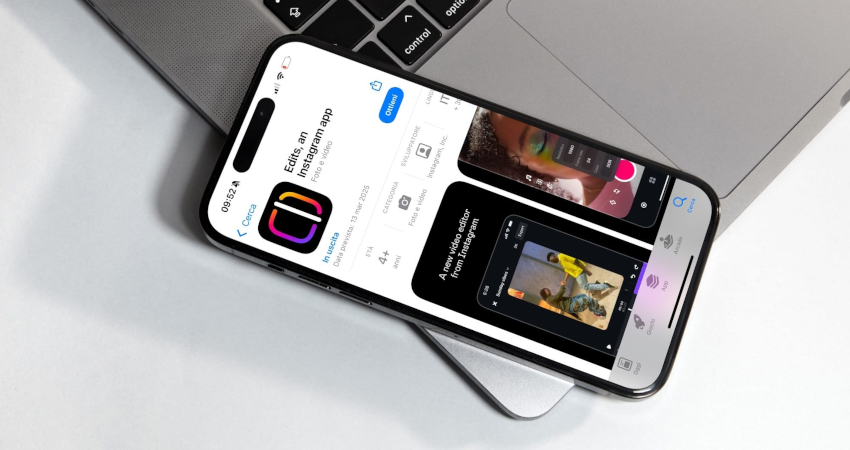
Instagram Edits It has become a very handy tool for creating, editing, and exporting short videos directly from your phone. The app lets you prepare Reels, vertical videos, content for TikTok, YouTube Shorts, Facebook or other platforms, without necessarily using complex editing software.
But one question often comes up: how to export an Instagram Edits video without losing quality? Many creators notice a difference between the video in the editor and the version published on social media. The image can become less sharp, details may be compressed, text can appear blurry, or the video may play less smoothly after publishing.
In this guide you'll learn how to prepare, export, and back up an Instagram Edits video with the best possible quality. We'll also cover mistakes to avoid, the right settings to choose, the difference between exporting and publishing, and how to keep a clean copy of your videos before platforms compress them.
Instagram Edits: why can the quality drop?
A video can lose quality for several reasons. The first often comes from the files used in editing. If you import an already compressed video, recovered from a messaging app or downloaded from a social network, it has already lost part of its quality. Even if you then export it at high resolution, you won't get back the lost details.
The second reason comes from the export. If you choose too low a quality, a poor format, or a resolution lower than your project, the final video will be less sharp. The third reason comes from the publishing platform. Instagram, TikTok, Facebook, or YouTube may re-compress the video after upload to adapt it to their servers, users' connection speeds, and playback formats.
To limit this loss, act even before pressing "Export". Final quality depends on the whole chain: source video, editing, resolution, format, backup, Internet connection, and publishing.
Export from Edits or publish directly: what's the difference?
When you finish an edit in Instagram Edits, you can usually save or share the video. It's important to distinguish two actions:
- Export the video: you create a video file on your phone, often in the gallery, the Photos app, or Files.
- Publish the video: you upload the video to Instagram or another platform, where it may be compressed after uploading.
To preserve the best quality, it's recommended to first export a clean copy to your device. This copy becomes your final original file. You can then publish this file on Instagram, TikTok, YouTube Shorts or other networks.
If you publish directly without keeping a copy, you risk relying solely on the platform's compressed version. In case of deletion, a bug, a blocked account, or a lost draft, you could lose your creation.
Before exporting: prepare a clean video
The best export starts with good source files. A video edited with blurry, dark, or already-compressed clips won't become perfectly sharp on export. Instagram Edits can improve your workflow, but it can't recreate all the details lost in a low-quality video.
Before editing, try to follow these simple rules:
- Shoot directly with your phone's camera if possible.
- Avoid using videos sent via WhatsApp or Messenger, which are often compressed.
- Keep the original files in your gallery or your cloud.
- Shoot in good lighting to reduce digital noise.
- Clean your phone's lens before filming.
- Avoid excessive digital zoom.
- Use the right format from the start: vertical for Reels, Shorts and TikTok.
- Avoid re-exporting the same video multiple times.
Each additional export can add another layer of compression. Ideally, edit from the original files, then make a single clean final export.
Which format should you choose for an Instagram Edits video?
For social networks, the vertical format is generally the most suitable. Instagram Reels, TikTok and YouTube Shorts primarily use a full-screen vertical display. The most common format is the 9:16.
Here are the settings to aim for a high-quality short video:
| Item | Recommended setting |
| Image format | 9:16 vertical |
| Solution | 1080 × 1920 minimum, 2160 × 3840 if 4K export is available |
| File format | MP4 if available |
| Frequency | 30 fps or 60 fps depending on the source video |
| Audio | Clear sound, balanced volume, not distorted |
| Text | Large, readable, placed well away from the edges |
If your source video is in 1080p, exporting to 4K won't magically turn the image into true 4K. However, exporting at a higher quality can sometimes limit degradation at the time of publication. If your original files are in 4K, exporting in 4K is more worthwhile.
How to export an Instagram Edits video in high quality?
Exact menus may vary by app version, but the logic is generally the same. Before starting, update Instagram Edits from the App Store or Google Play to get the latest export options.
- Open the app Instagram Edits.
- Select your video project.
- Check your edit: text, audio, transitions, subtitles, and framing.
- Press the share or export button.
- Choose the best quality offered, ideally HD, 2K, or 4K depending on available options.
- Export the video to your phone before publishing it.
- Wait for the export to finish completely.
- Open the exported video in your gallery to check sharpness and audio.
- Then publish the video on Instagram or another platform.
The most important point is to keep a local copy of the final file. This exported version will be your primary archive, before any compression by social networks.
Should you export in 4K from Instagram Edits?
Exporting in 4K can be useful if your video was shot in high quality, if you want to keep a clean archive, or if you plan to reuse the content across multiple platforms. A 4K export contains more pixels than a 1080p export, which can give you more headroom before compression.
But 4K isn't always necessary. If your video is short, intended only for social media and shot in 1080p, a clean HD export can be enough. 4K takes more space on the phone and can take longer to send.
Here's a simple rule:
- Export 4K: ideal for archiving, reuse, premium content, videos shot in 4K.
- 1080p export: sufficient for the majority of Reels, Shorts, and TikTok.
- Low-quality export: avoid unless you are really short on space.
How can you avoid compression after publishing on Instagram?
Even if you export a clean video from Edits, Instagram may recompress the file after upload. You can't completely eliminate this compression, but you can limit it with a few best practices.
- Publish from a stable Wi-Fi connection.
- Avoid sending a video over a weak or unstable connection.
- Use a vertical video in the correct format from the start.
- Don't make multiple exports before publishing.
- Avoid text that's too small, which becomes blurry after compression.
- Avoid heavy filters or very fine details if the video will be highly compressed.
- Save an exported copy before publishing.
A good connection at upload time can also help. If your upload is done in poor quality due to an unstable network, the output may be less clean.
Export an Edits video for TikTok, Shorts, or Facebook
One of the benefits of Instagram Edits is being able to prepare a video usable across multiple platforms. If you want to publish the same creation on TikTok, YouTube Shorts, or Facebook, export a clean version without text too close to the edges.
Each platform displays its own buttons, descriptions, captions and UI areas. If your text is too low or too high, it can be hidden by icons, comments or the description. So keep important elements centered in the image.
For a multi-platform video, follow this method:
- Create your edit in Edits.
- Place text in a safe area in the center.
- Export a version without publishing it immediately.
- Check the video in your gallery.
- Publish manually on each platform.
- Tailor the caption, hashtags and call to action for each platform.
Avoid uploading a video that's already been published on a platform to repost elsewhere. It has probably already been compressed. It's better to start from the clean exported file from Edits.
Why you shouldn’t retrieve a video that’s already compressed?
When a video is posted on a social network, it is often converted and compressed. If you then download it to repost elsewhere, you're starting from an already degraded version. If another platform compresses it again, the quality drops further.
This is the problem of double compression. The signs are easy to recognize:
- less sharp image;
- blurry text;
- muddier colors;
- blocks visible in dark areas;
- sound less clear;
- video more pixelated after republishing.
To avoid this, always keep the version exported from Edits. This is the version you should use to repost on TikTok, YouTube Shorts, Facebook, Pinterest, or your website.
How to back up an Edits video on iPhone?
On iPhone, the exported video can be saved to the Photos app or the Files app depending on the option chosen. After exporting, take a few seconds to check the file's location.
- Export the video from Instagram Edits.
- Open the app Photos.
- Check that the video appears in Recent items.
- Watch it all the way through to check the picture and sound.
- Add it to a dedicated album, for example "Vidéos Edits".
- Send a copy to iCloud Drive, Google Drive, or an external drive if needed.
If you create a lot of videos, organize them from the start. A simple album per month or per project can save you hours of searching for a file.
How to save an Edits video on Android?
On Android, exported videos are typically found in the gallery, Google Photos, or the videos folder depending on the phone model. They may also appear in a folder associated with the app.
- Export the video from Instagram Edits.
- Open your gallery or Google Photos.
- Check your recent files.
- Check that the file plays correctly.
- Move the video into a dedicated folder.
- Save a copy to Google Drive, OneDrive, or your computer.
If you can't find the video, open the file manager and look for the folders "Movies", "Videos", "Download" or the app's name. You can also sort files by date to locate the latest export.
How to name your video files so you don't lose them?
A good filename helps you quickly find a video. Automatic names aren't always clear. If you export lots of content, rename your files using a simple structure.
2026-07-reel-promo-ete.mp4
2026-07-tiktok-tutoriel-export-edits.mp4
2026-07-short-astuce-video-ia.mp4
2026-07-instagram-reel-produit-nouveau.mp4
You can also create folders by platform or by project:
- Instagram Reels
- TikTok
- YouTube Shorts
- Client videos
- AI Videos
- Original archives
- Final exports
This setup is very useful if you create videos for multiple accounts or brands.
What to do if the exported video is blurry?
If the video exported from Edits already appears blurry in your gallery, the problem probably comes from the project or the source files. First check the quality of the original clips. A video received via messaging or retrieved from another platform may already be degraded.
Then try these solutions:
- Re-export using the highest available quality.
- Use original files instead of compressed files.
- Avoid zooming in heavily on a 1080p video.
- Remove overly heavy effects if the output becomes unstable.
- Make sure the phone has enough free space.
- Restart the app if the export seems to be glitching.
- Update Edits.
If the video is sharp in your gallery but blurry after publishing, the problem is likely the platform’s compression or the connection used at upload time.
What to do if the audio is out of sync or of poor quality?
Out-of-sync audio can occur if the source video has a variable frame rate, if the project contains many cuts, or if the app encounters a problem during export. Poor audio quality can also result from a source file that's already compressed.
To limit problems:
- Use clean audio files.
- Avoid importing multiple compressed versions of the same audio.
- Check the volume before exporting.
- Listen to the full video after export.
- Re-export if the audio is out of sync.
- Avoid closing the app during export.
- Keep enough free space on your phone.
If you post across multiple platforms, also check audio rights. Some music available on Instagram may not be usable the same way on TikTok, YouTube, or Facebook.
Can you use All-Downloader to retrieve a published video?
All-Downloader can be useful if you want to retrieve a public video you posted yourself and have lost the original file. For example, if you exported an Edits video, posted the Reel, then deleted the file from your phone, you can try to recover your own public video.
In that case, you can use the page to download an Instagram video, provided you respect content rights. For TikTok videos, you can also check the tool for download a TikTok video. If your video is published on YouTube, use the appropriate tool to download a YouTube video.
Warning: downloading a video that has already been published won't always match the quality of the original file exported from Edits. The best solution is to save your final export before publishing.
Why keep a copy before publishing?
Keeping a local or cloud copy of your videos is an essential habit. Drafts can disappear after an update, an uninstall, a phone change, an app bug, or accidental deletion. An account can also be temporarily blocked or inaccessible.
If you create videos for a client, brand, or campaign, the archive becomes even more important. It lets you republish, edit, recycle, or prove the work done.
- Keep the project in Edits until it's finalized.
- Export a final high-quality version.
- Save the video to the gallery.
- Add a copy to the cloud.
- Also keep the important original files.
- Don't rely solely on the version posted on Instagram.
Checklist for exporting without losing quality
Before each export, use this simple checklist:
- Use original, uncompressed videos.
- Edit in the right format, ideally vertical 9:16.
- Avoid text that's too small.
- Keep important elements away from the edges.
- Choose the best available export quality.
- Export before publishing.
- Check the video in the gallery.
- Check the sound until the end.
- Back up a copy to the cloud.
- Then publish from a stable connection.
Mistakes to avoid with Instagram Edits
To keep a video sharp, avoid these common mistakes:
- Edit with videos already sent via messaging.
- Export in low quality to save a few seconds.
- Publish without keeping a copy on the phone.
- Download a video from Instagram to repost it elsewhere.
- Placing text too close to the edges of the screen.
- Publishing with a weak connection.
- Delete drafts before saving the final export.
- Re-export the same video multiple times.
- Forgetting to check the audio before publishing.
These mistakes may seem simple, but they account for much of the blurriness or degradation in videos after publication.
Export an AI-edited video from Instagram Edits
More and more creators use videos generated or enhanced by AI, then edit them in Instagram Edits. In that case, backing up is even more important. Some AI tools don’t keep creations for long, or limit access to older exports.
If your video comes from an AI generator, first download the original file from the tool you used. Then import it into Edits to add text, cuts, music, transitions or subtitles. Finally, export a clean final version and archive it.
To learn more, you can read our guide: how to back up your AI videos before losing them.
FAQ: exporting an Instagram Edits video
Does Instagram Edits allow exporting without a watermark?
Yes, Instagram Edits is presented as a video editor that allows exporting videos without a watermark. It's one of its advantages for creators who want to publish across multiple platforms.
Can an Edits video be exported in 4K?
Instagram Edits offers high-quality export, including 4K depending on available options. To truly benefit from 4K, it's best to start from footage shot in high resolution.
Why does my Edits video become blurry on Instagram?
Video can become blurry because of Instagram’s compression, a poor connection during upload, a source file that was already compressed, or an export at too low a quality.
Should you export before publishing?
Yes, it's best to first export a clean copy to your phone. This copy will serve as an archive and can be reused on other platforms without relying on the compressed published version.
Which format should you choose for an Instagram Reel?
The vertical 9:16 format is best for a Reel. A resolution of 1080 x 1920 is generally sufficient, but a 4K export can be useful for keeping a higher-quality archive.
Can I repost an Edits video on TikTok or YouTube Shorts?
Yes, if you own the content or have the necessary rights. Export a clean version from Edits, then publish it separately on TikTok, YouTube Shorts, or Facebook, adapting the caption and hashtags.
What should I do if I lost my original export?
If the video is public and belongs to you, you can try to retrieve it from the platform where it was published. But the quality may be lower than that of the original export. To avoid this, always back up your final files.
Conclusion
Exporting an Instagram Edits video without losing quality mainly requires good habits. Use original files, edit in the correct format, choose the highest available export quality, keep a local copy, and publish from a stable connection. Final quality depends as much on preparation as on the export itself.
For creators, freelancers, brands and community managers, the most important thing is not to rely solely on the version published on Instagram. A video compressed by a social network is not a real archive. Export your final file, save it in your gallery or your cloud, then use that clean version for your future posts.
And if you've lost a video that's already been published, All-Downloader can help you test the link to your own public content on Instagram, TikTok, or YouTube, provided you respect content rights and the platforms' rules.